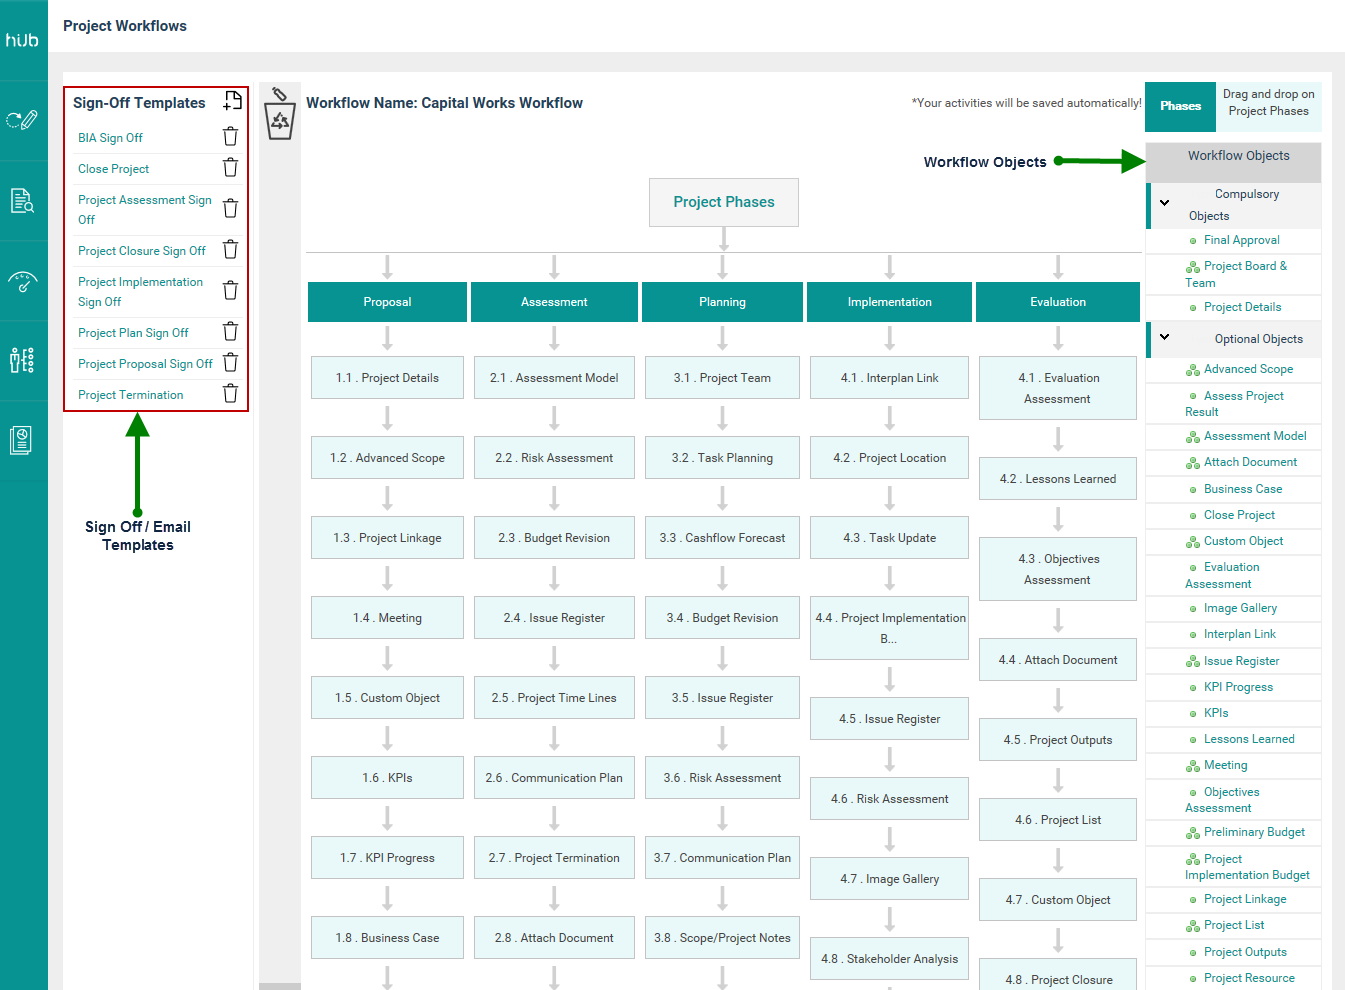
The left side pane of the project workflow page displays the sign off templates and email templates. The list on the right side displays all available workflow objects. There are two types of objects: Compulsory objects and Optional objects.
STEP 1: In order to create a new Phase, simply drag a phase from the 'Phases' box and drop onto the 'Project Phases' box in the middle of the screen. Wait for the blue dotted line to appear around 'Project Phases' box. When it appears, release the 'Phases' box to create a new Phase.

|
|
You cannot add an object without creating a project phase. A warning message will appear if you attempt to add an object without a phase. You cannot delete the initial phase and the project details object. Warning message will appear when trying to delete the initial phase. |
STEP 2: Enter a title for the phase according to your organisation's requirements and click 'Save'.

Once the first phase has been added, it will also automatically add the 'Project Details' object as the first object of the workflow.
|
|
You cannot delete the initial phase and the project details object. Warning messages will appear if you try to delete these items. |
Similarly, you can include multiple phases and objects by dragging and dropping them into the relevant locations. Ordering of the phases and objects will depend on your organisational preference.
 |
You can change the position of an object at any time by dragging and dropping the object to the required location in the workflow. |
Objects under a particular phase get numbered automatically according to the sequence in which they are placed within the phase.
 |
Business Rules
|
STEP 3: To modify a phase title, click on the particular phase and enter a new title. You have the option of altering the terminology and visibility settings of fields within each Object screen as shown below. Remember, the changes that you make will be reflected within the phases and can be seen by all the users.
STEP 4: In order to edit, click on the object. A pop-up window will appear to edit the terminology.
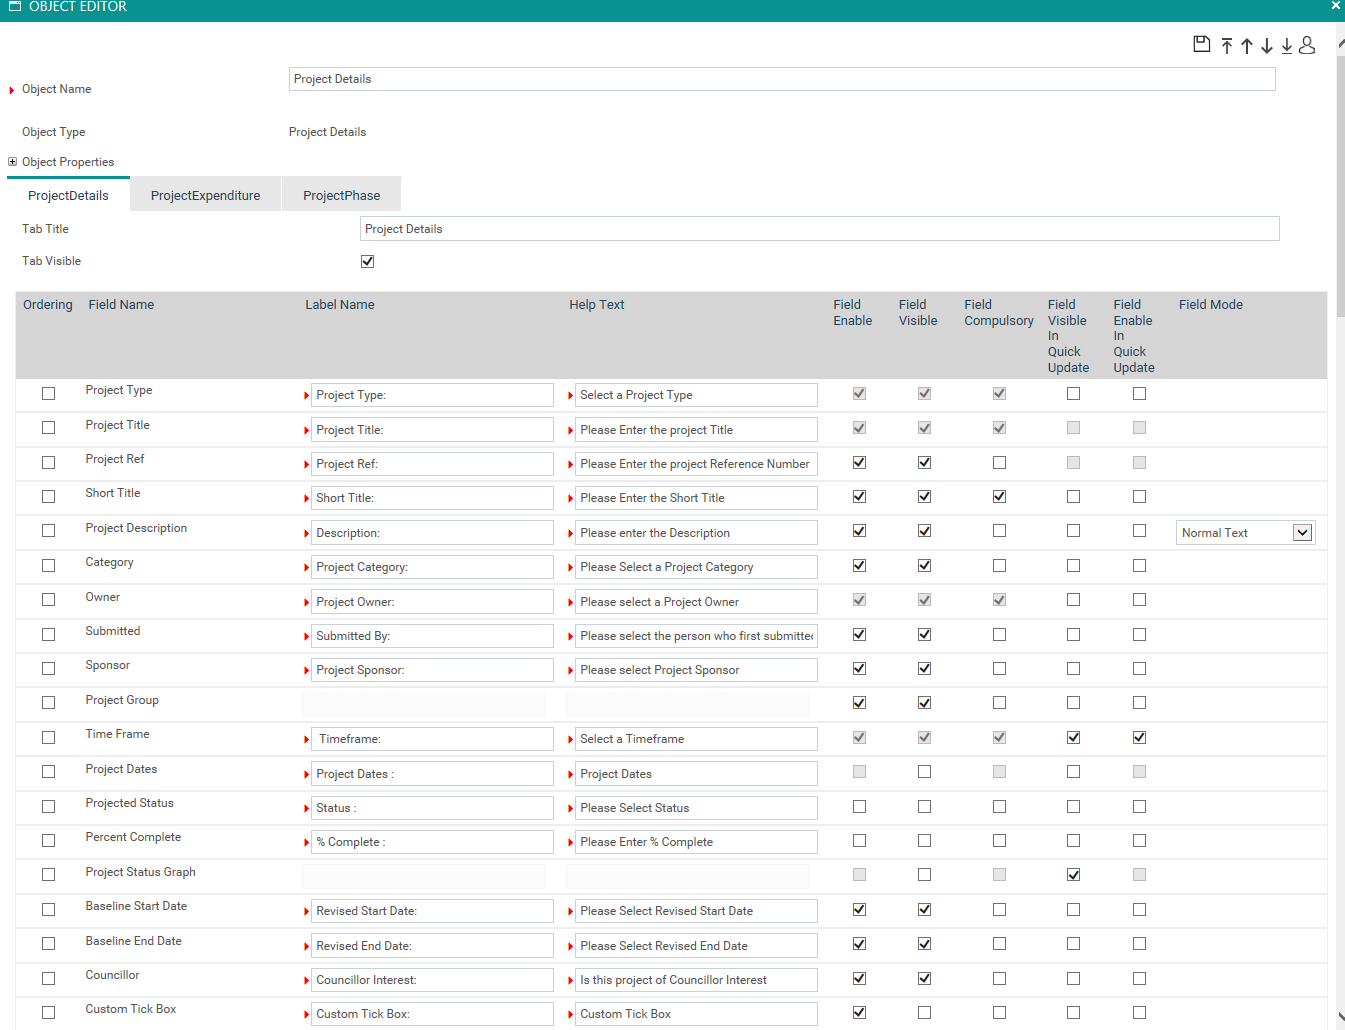
You can alter the terminology and visibility by customising the following.
|
Field |
Descriptions/Instructions |
Mandatory/Optional |
|
Object Name |
Shows the default object name which can be edited as required |
Mandatory |
|
Field Name |
The default field name |
Mandatory |
|
Label Name |
Shows the default field name which can be edited as required |
Mandatory |
|
Help Text |
Help text displayed when hovering over help icon for this field Shows the default text which can be edited as required |
Mandatory |
|
Field Enable |
If ticked, the selected field will be active but invisible to the user unless 'Field Visible' is also ticked. |
Not Applicable |
|
Field Visible |
If ticked, the selected filed will be visible (read only) within the screen. However, if 'Field Enable' is also ticked then you can enter/update data. |
Not Applicable |
|
Field Compulsory |
If ticked, the selected field will be a mandatory field within the screen. |
Not Applicable |
 |
Note that a few key fields have tickboxes greyed out; this is due their behaviour and visibility settings are fixed as system defaults and cannot be modified. Similarly, you can configure other object's terminology and visibility. However, each object is associated with a particular function and contains different sub sections and fields. |
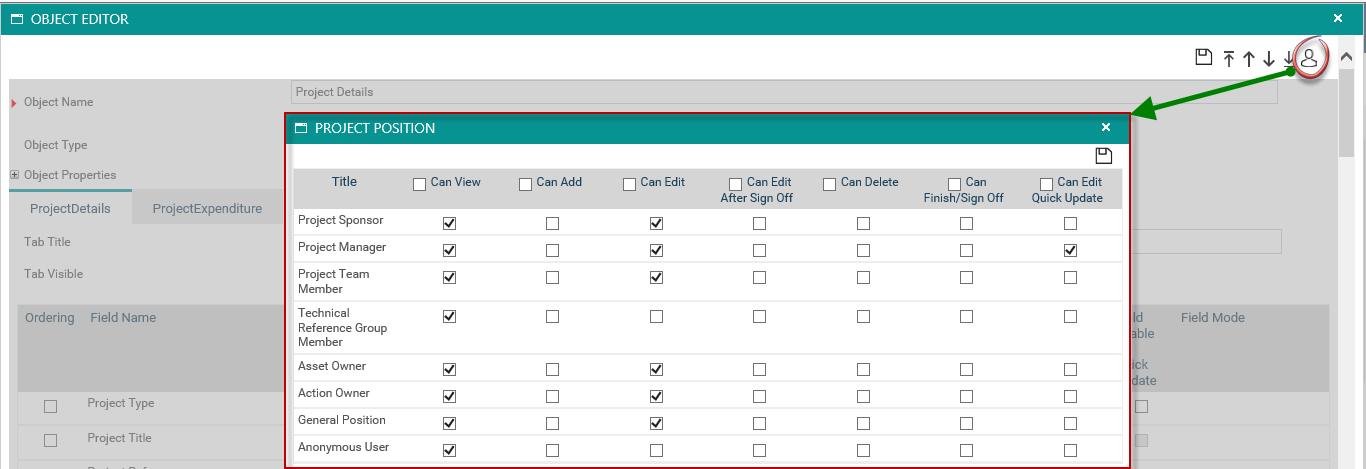
Administrator has the option to configure permission for an object for a particular workflow.
Clicking on the Set permission icon, the administrator can enable permission for an object for relevant positions. Permission types are as follows:
· Can view
· Can add
· Can edit
· Can delete
· Can finish/Sign off (when an object sign off is placed, only staff with this permission can give approval)
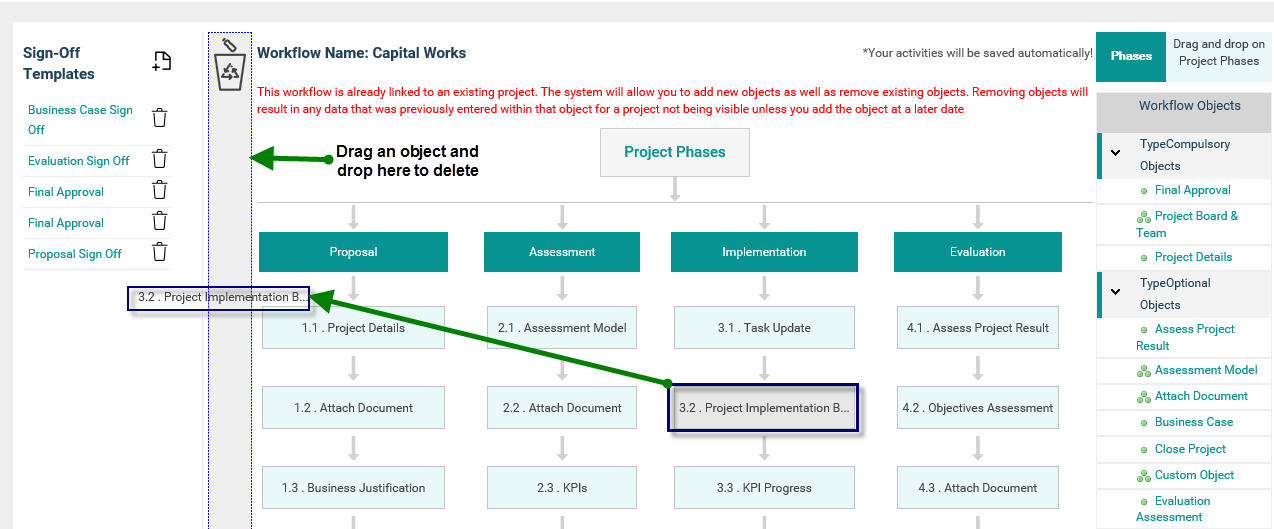
STEP 5: To remove an object from the workflow, simply drag it to the recycle bin.
Note that if a workflow has been applied to any existing projects the system will not allow you to delete any objects within it.
Using Sign off and Generic Email objects in Phases
STEP 1: Place the business case objects and define the phases for the workflow as necessary.
STEP 2: Drag & drop desired Sign off / Generic objects to required positions.
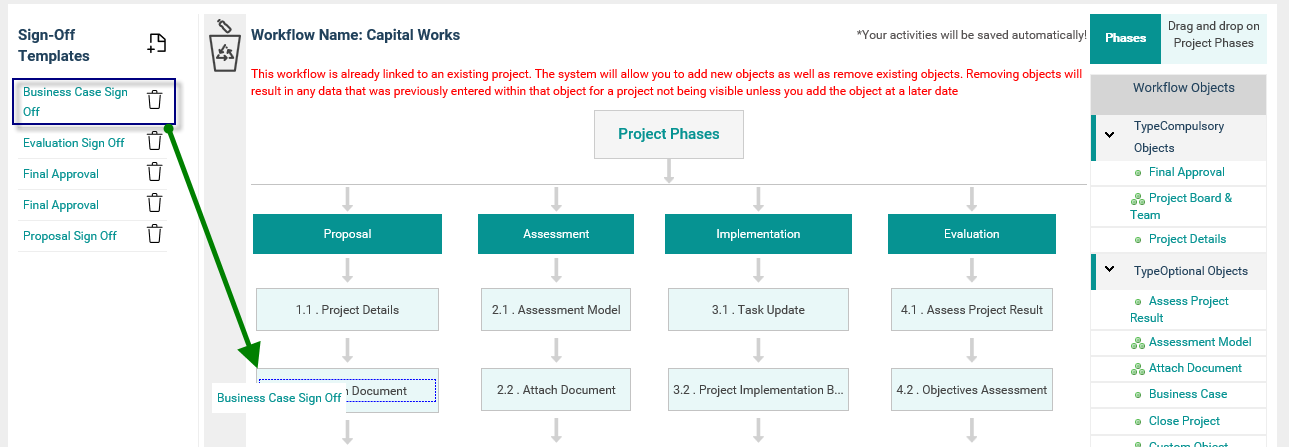
STEP 3: Click on the object to modify the name.
STEP 4: Click 'Save'.
See 'Assigning Sign Off Templates; for more information.
Copyright © 2014-2015 CAMMS Online Help. All rights reserved.
Last revised: July 26, 2017